Atwood RV Water Heaters
Atwood RV Water Heater Maintenance Tips!
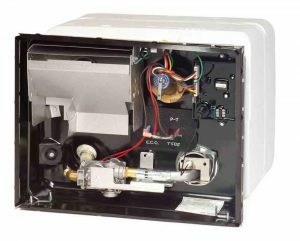
 These are proven methods for maintaining an Atwood RV Water Heater. Even though it is Atwood-specific, the principles hold true for Suburban and Dometic RV Water Heaters as well. Atwood provides the proper methods to maintain their water heaters, which should be followed for many good reasons. Listen to my podcast and hear what you need to know.
Unpleasant Odors:
A “rotten egg odor” (hydrogen sulfide) may be produced when the electrogalvanic action of the cladding material releases hydrogen from the water. If sulfur is present in the water supply, the two will combine and produce an unpleasant smell.
- Turn off the main water supply. Drain the water heater tank and reinstall the drain plug. Remove the pressure-temperature relief valve. Mix a solution of four (4) parts white vinegar to two (2) parts water. (For a 10-gallon tank, use six (6) gallons of vinegar to four (4) gallons of water). With a funnel, carefully pour the solution into the tank.
- Cycle the water heater with the above solution, letting it run under normal operation 4-5 times.
- Remove the drain plug and thoroughly drain all water from the tank. Flush the water heater to remove any sediment. You may flush the tank with air pressure or fresh water. Pressure may be applied through either the inlet or outlet valves on the rear of the tank or through the pressure/temperature relief valve coupling located on the front of the unit. To flush the tank with air pressure, Insert your air pressure through the pressure-temperature relief valve coupling. With the drain valve open, the air pressure will force the remaining water out of the unit. To flush the tank with water pressure: Fresh water should be pumped into the tank with either the onboard pump or external water pressure. Continue this flushing process for approximately five minutes, allowing the fresh water to agitate the stagnant water on the bottom of the tank and forcing the deposits through the drain opening.
- Replace the drain plug and pressure-temperature relief valve.
- Refill the tank with fresh water that contains no sulfur.
The Atwood water heater is designed for use in a Recreation Vehicle. If you use your vehicle frequently or for long periods of time, flushing the water heater several times a year will prolong the life of the storage tank.
 Dripping Pressure Temperature Relief Valve:
Weeping or dripping of a pressure-temperature relief valve while the water heater is running DOES NOT mean it is defective. This is a normal expansion of water as it is heated in the closed water system of a recreation vehicle. The Atwood water heater tank is designed with an internal air gap at the tank to reduce the possibility of weeping and dripping. In time, the expanding water will absorb this air. To replace the air, follow these steps: To restore the air:
- Turn off the water heater.
- Turn off incoming water supply.
- Open the closest hot water faucet in the coach.
- Pull the handle of the pressure-temperature relief valve straight out and allow water to flow until it stops.
- Allow the pressure-temperature relief valve to snap shut, close the faucet, then turn on the water supply.
 Flushing & Winterizing Water Heater Tank:To ensure the best performance of your water heater and add to the tank’s life, periodically* drain and flush the water heater tank. Before long-term storage or freezing weather, drain and flush the tank.
1. Turn off the main water supply (the pump or water hook-up source).
2. Drain the Water Heater Tank by removing the drain plug. If the water flows sporadically or trickles instead of a steady stream of water, we recommend the following action: first, open the Pressure Temperature Relief Valve to allow air into the tank, and secondly, take a small gauge wire or coat hanger and poke through the drain opening to eliminate any obstructions.
3. After draining the tank, because of the placement of the Drain Plug, approximately two quarts of water will remain in the tank. This water contains most of the harmful corrosive particles. To remove these harmful corrosive particles, flush the tank with either air or water. Whether using air or water pressure, it may be applied through the inlet or outlet on the rear of the tank or the Pressure Temperature Relief Valve. (If using the Pressure Temperature Relief Valve, the Support Flange must be removed). The pressure will force out the remaining water and the corrosive particles. If you use water pressure, pump fresh water into the tank with the assistance of the onboard pump or use external water for 90 seconds to allow the fresh water to agitate the stagnant water on the bottom of the tank and force deposits through the drain opening. Continue adding water and draining until the particles have been cleared from the water remaining in the tank. 4. Leave the Drain Plug out and close the Pressure Temperature Relieve Valve. The approximately two quarts of water remaining in the tank after draining will not cause damage to the tank should freezing occur.
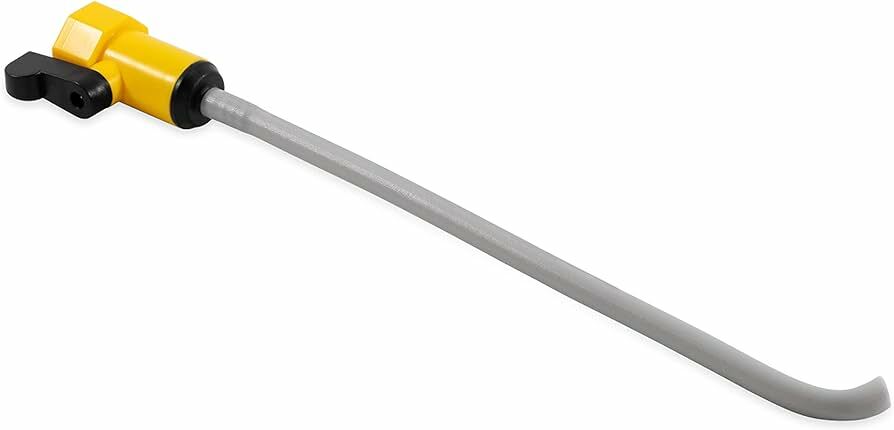
 RV Water Heater Tank Flusher: An easy way to flush any RV Water Heater tank is this inexpensive flushing tool that hooks up to any fresh water hose and works for effectively and quickly to flush out the tank. Flushing any RV Water Heater is messy and can waste a lot water, this flusher reduces the waste and mess and saves time. Simple to use and simple to store.
 General Water Heater Information
• The Atwood Water Heater is designed for recreation vehicles.
• To function properly, the water system and water heater must be turned on. • Periodically* check gas pressure; it should read a minimum of 11 inches of water column (with at least 50% of BTU demand on system). • The use of Manufacturers’ Aftermarket Heating Element devices (Hot Rods, etc.) may result in damage to components or water heater and will void the warranty. • Periodically* drain and flush water heater. • Before storing RV, always drain and flush the water heater. • An undrained water heater tank will crack in freezing conditions. * Periodically: At least once each camping season, more often if you camp frequently
• The Atwood Water Heater is designed for recreation vehicles.
• To function properly, the water system and water heater must be turned on.
• Periodically* check gas pressure; it should read a minimum of 11 inches of water column (with at least 50% of BTU demand on system).
• The use of Manufacturers’ Aftermarket Heating Element devices (Hot Rods, etc.) may result in damage to components or water heater and will void the warranty.
• Periodically* drain and flush water heater.
• Before storing RV, always drain and flush the water heater.
• An undrained water heater tank will crack in freezing conditions.
* Periodically: At least once each camping season, more often if you camp frequently.
Anode Rods: Atwood/Dometic does not recommend the use of an Anode Rod in their Water Heaters. The tanks are designed to resist corrosion and by using one during the warranty period will void the warranty. After the water heater is out of warranty you can use one if you choose to. The anode rod for the Atwood has not been around for a real long time, relatively speaking. I have not heard anything bad about using one and I have also heard that some RV'ers swear by them and will not go without. I would use one if I had an RV with an Atwood Water Heater in it. I own a Suburban Water Heater myself. The Anode Rod gets installed in place of the drain plug, they both have the same thread and use a 7/8" socket. 10 Gallon Atwood Water Heaters require a longer Anode Rod (10"). 6 Gallon require a 4.5" Anode Rod.
Tools Needed:
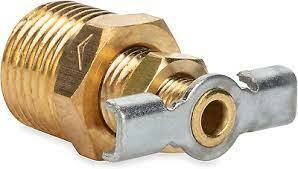
7/8" Socket to remove Drain Plug w/ 1/2" male pipe thread - Atwood Drain Plug Part #91857
T & P Tool to remove the Pressure Relief Valve - Part #10552
Pressure Relief Valve (1/2" Thread) for most Atwood Water Heaters - Part #10423
Pressure Relief Valve (3/4" Thread) for Atwood XT water Heaters- Part #10473
Tank Flusher used to Flush Water Tank Almost Painlessly - Part #A10-4010VP
7/8" Socket to remove drain plug to install an Anode Rod. Sold @ Your Local Tool Store.
For questions, please contact Us @ 1-800-789-5588 Listen now Radio Arizona RV!
